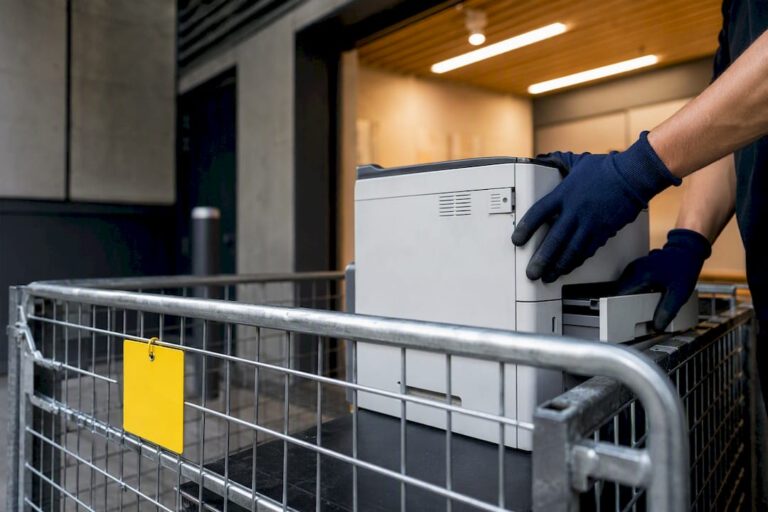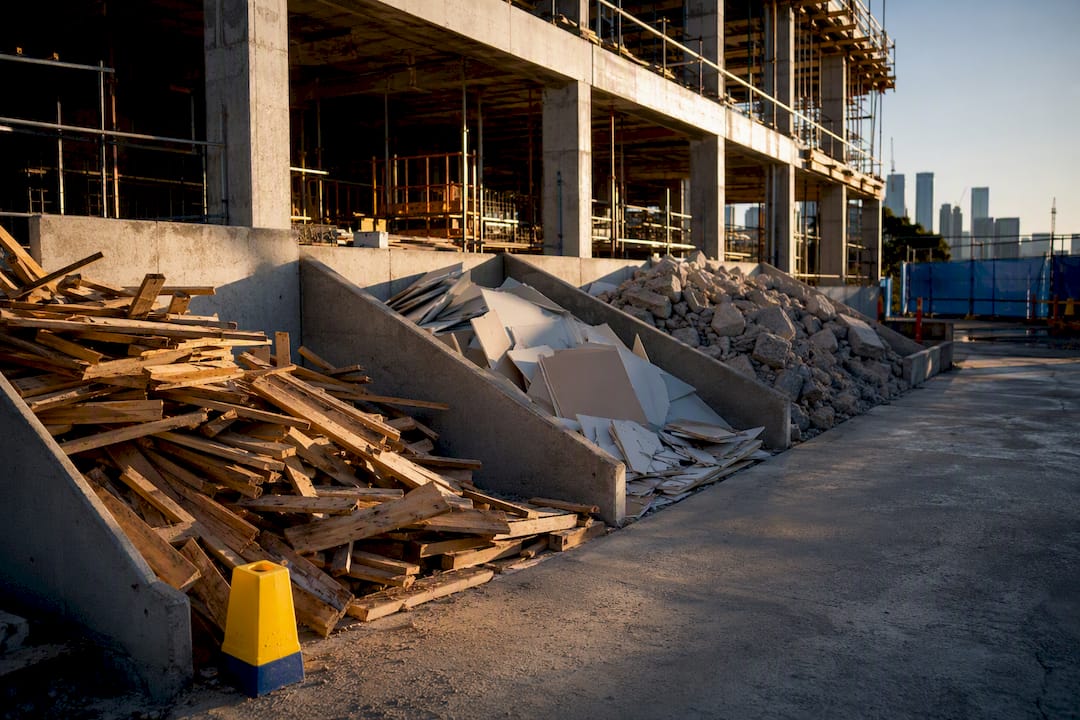
A construction waste management plan documents every waste stream a project will generate, how much avoidance and reuse happens before disposal, which lawful facilities receive the rest, and how you track and report all of it. Most councils and EPAs won’t sign off approvals without three things: a waste classification method, quantity estimates by stream, and named receival sites with a tracking system attached. Get those three sorted first, then build out the checklist below and attach a one-page template to your development application or CEMP.
TL;DR:
- Ensuring the waste classification method, quantity estimates, and receival site details are clear and accurate is crucial for project approval and compliance.
- Material take-offs should be used to estimate waste quantities, with margins added for typical loss; avoid rough guesses or vague estimates.
- A well-organized site layout with designated segregation zones and proper signage reduces contamination and streamlines waste management operations.
- Proof of lawful waste disposal relies on weighbridge dockets, receival receipts, and tracking systems like GPS or manifests, not just visual counts of bins.
- Contractually binding waste responsibilities, clear reporting obligations, and linking payments to compliance evidence prevent unlawful disposal and improve project oversight.
Table of Contents
- What does a construction waste management plan need to include?
- How do you estimate construction waste quantities?
- How do you reduce waste before it’s even generated?
- How do you set up bins and stockpiles on a busy site?
- What proof do you need for lawful transport and disposal?
- How do you write waste obligations into contracts and tenders?
- How do you monitor and report waste performance monthly?
- What actually goes wrong on real projects?
- A copy-paste WMP template and worked example
- Turning your WMP into action on site
- Where to find the official templates and guidelines
- Sources
- FAQ
What does a construction waste management plan need to include?
Regulators and councils aren’t looking for a mission statement. They want a document that proves you’ve thought through where waste comes from, where it’s going, and how you’ll prove it got there lawfully. The NSW EPA’s construction and demolition toolkit sets out the core content expected in a compliant WMP, and most state and council templates echo the same structure.
Here’s what belongs in the document, section by section:
- Project summary and contacts — project address, builder/developer details, site supervisor’s name, and an emergency contact for contamination incidents.
- Roles and responsibilities — who classifies waste, who books removals, who signs off dockets, and who reports monthly.
- Waste classification method — how each stream will be classified against state guidelines, including triggers for sampling and laboratory testing on suspect soils or building materials.
- Estimated quantities per stream — a table showing tonnes or cubic metres expected for each material, with the calculation method noted.
- On-site segregation plan — bin types, bin schedule, labelling, and a site diagram showing where each waste stream is stored.
- Receival site register — the name, licence status and accepted waste types for every facility you intend to use.
- Transport and tracking arrangements — vehicle types, load covering requirements, and the tracking method (GPS, WasteLocate, or manifest system).
- Reporting schedule and diversion targets — how often you’ll report, to whom, and what percentage diversion you’re targeting for the project.
- Contingency plan — the procedure for unexpected finds like asbestos or contaminated soil, plus a contingency budget line.
Two things trip up otherwise solid plans at the approval stage. The first is vague quantity estimates — “approximately some concrete” doesn’t cut it; assessors want numbers tied to a calculation. The second is missing receival site detail. A generic “waste will be taken to an approved facility” line gets kicked back almost every time; name the facility and note its licence status.
Record retention matters too. Most council templates and the Transport for NSW waste management guideline expect dockets and manifests kept for the life of the project plus a defined retention period afterward, so build that into your document management from day one rather than scrambling for records during an audit.
How do you estimate construction waste quantities?
Guessing waste volumes from gut feel is how WMPs get rejected or, worse, how projects blow their skip budgets three weeks into the build. The better approach starts with your material take-offs and works backward to expected waste.
Take your ordered quantities of timber, plasterboard, concrete, and bricks, then apply a waste margin based on typical cutting loss, breakage, and offcuts for that material. Supplier delivery dockets are useful here too. If you’ve ordered 40 sheets of plasterboard and the take-off called for 35, that difference tells you roughly how much offcut waste to expect once installation is done.
Different materials generate waste at very different rates. Plasterboard, cut heavily around openings and services, tends to waste more than a material like concrete poured to a fixed volume.
These are general planning margins, not guarantees. Actual waste depends on design complexity, crew experience, and how tightly the site is supervised.
For excavated material or anything you suspect might be contaminated, don’t estimate at all. Commission pre-characterisation sampling and NATA-accredited laboratory testing before you move a cubic metre off site. The NSW EPA’s guidance on construction and demolition waste is explicit that all waste, including excavated rock, soil, and any suspected asbestos or contaminated material, must be classified against state waste classification guidelines before transport, and getting that classification wrong carries real legal exposure.
Worked example: plasterboard on a mid-size renovation
Say your take-off calls for 200 sheets of standard plasterboard. That figure goes straight into your WMP’s quantity table, tagged against your chosen receival facility, and becomes the number you reconcile against actual dockets once the job wraps.
How do you reduce waste before it’s even generated?
The single biggest lever in any WMP isn’t a better bin schedule. It’s shifting the focus from managing waste to avoiding it in the first place, a point the NSW EPA’s toolkit makes directly: early material assessment and procurement discipline outperform downstream sorting every time.
Work through these in rough priority order, and record which ones you’ve actually adopted in the WMP itself, not just in a design meeting:
- Order accurately, not generously. Tie material orders directly to take-offs rather than rounding up “to be safe” — that habit is where a lot of skip-bound offcuts start their life.
- Prefabricate where the design allows it. Off-site fabrication of frames, trusses, and cassette panels cuts on-site cutting waste dramatically because the offcuts stay at the factory, not your skip.
- Negotiate supplier take-back agreements. Some plasterboard and timber suppliers will take back unused, undamaged stock or packaging, which is worth writing into your procurement contracts up front.
- Deconstruct before you demolish. Salvageable doors, fittings, bricks, and structural timber have real resale or reuse value, and a staged deconstruction ahead of demolition proper often recovers more material than a straight knockdown.
- Reuse clean excavated spoil on site where lawful. Clean fill can often go straight into landscaping or level-up works on the same site, avoiding transport and disposal costs entirely, provided it’s been properly classified as clean.
- Route the rest through established recycling markets. Concrete and brick crushing, timber mulching, and metal recovery all have mature commercial channels in most metro areas, and diversion here is usually cheaper than landfill once you factor in levy costs.
Pro Tip: Get your procurement team and site supervisor in the same room before ordering starts. Waste avoidance decisions made at the ordering stage are worth ten times what you’ll recover through better sorting once the offcuts already exist.
How do you set up bins and stockpiles on a busy site?
A checklist is only as good as the site layout that supports it. Before the first skip arrives, map out dedicated segregation zones on your site plan, allocating separate, clearly bounded areas for each major waste stream rather than letting bins cluster wherever there’s spare concrete.
Placement matters for two reasons: contractor compliance and contamination control. If the timber bin is a hundred metres from where the framing crew is working, offcuts end up in whichever bin is closest, mixed streams every time. Put segregation points within easy reach of where each trade actually generates that waste.
- Position bins where the relevant trade works, not just wherever there’s spare yard space.
- Use pictographic, multi-lingual signage on every bin, since a mixed-trade site often has several first languages on the crew.
- Set maximum stockpile heights and specify bunding for any stockpiled soil or aggregate to control runoff.
- Keep stockpiles clear of flood-prone low points and away from stormwater drains.
- Run a daily housekeeping check as part of the supervisor’s walk, not a weekly one.
- Have a written overflow procedure so a full bin gets swapped, not used as an excuse to dump into the wrong stream.
Dust suppression deserves its own line in the plan wherever aggregate or demolition rubble is stockpiled for more than a day or two, particularly in warmer months when a dry stockpile can generate visible dust plumes that draw complaints fast.
Pro Tip: Photograph your bin layout and stockpile zones once the site plan is finalised, then attach that photo directly to your WMP. Auditors and council officers respond far better to a real image than a hand-drawn diagram that may or may not match what’s actually on site.
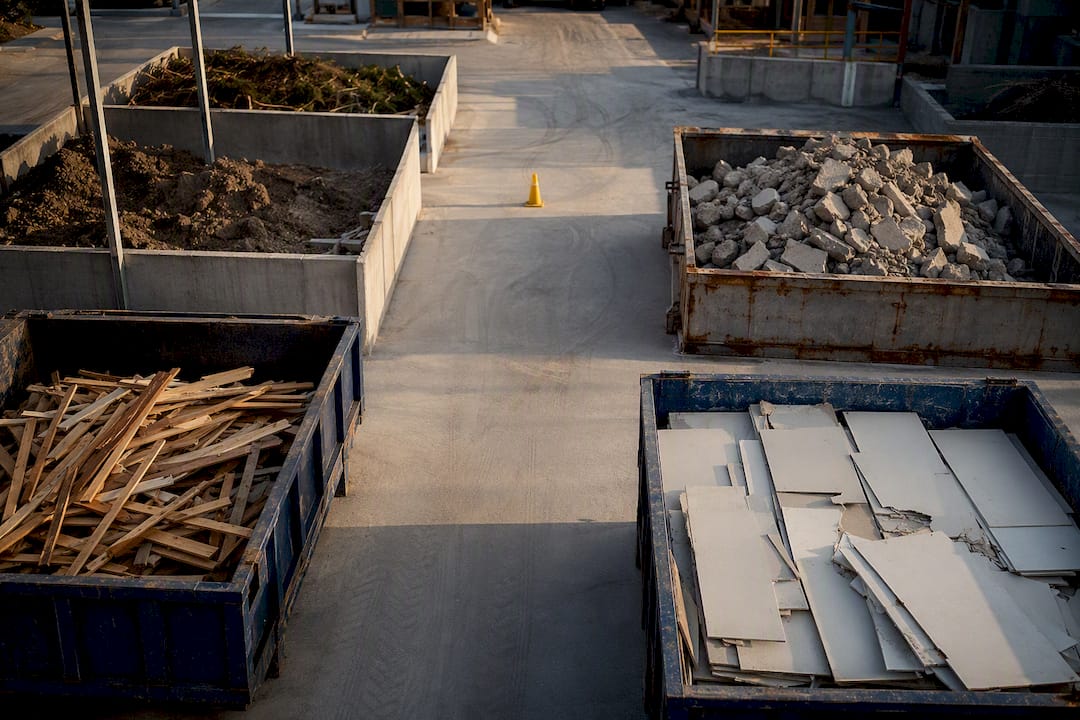
Contamination response needs a clear trigger too: if a load turns up mixed, who stops the truck, who re-sorts it, and who records the incident. Write that procedure down now, because working it out mid-clean-up wastes time and money.
What proof do you need for lawful transport and disposal?
This is where WMPs live or die during an audit. A tidy checklist means nothing if you can’t produce paper trails showing every load actually reached a lawful facility.
Before you book a receival site, check three things: its environment protection licence (EPL) is current, its development consent permits it to accept your specific waste type, and it’s actually licensed for the volumes you’re sending. A facility that’s fine for clean concrete may not be licensed to accept contaminated soil, and sending the wrong stream to the wrong site is a compliance failure that lands on the builder, not the transporter.
Once loads start moving, the evidence trail needs to include:
- Weighbridge dockets for every bulk movement, particularly soil and aggregate, since Queensland Government guidance on disposal levy compliance treats verified weighbridge receipts as standard proof for levy and audit purposes.
- Consignment notes identifying waste type, quantity, and origin for anything classified as regulated waste.
- Receival dockets from the destination facility confirming what actually arrived, not just what left site.
- Manifest reconciliation matching what you estimated in the WMP against what the dockets actually show, monthly if possible.
Transport requirements themselves are worth locking down contractually. Loads should be covered in transit, vehicles need to be appropriately licensed for the waste class, and larger projects increasingly rely on GPS tracking or systems like WasteLocate to prove chain of custody, a requirement the Transport for NSW waste management guideline sets out for bigger jobs. Interstate movements trigger extra notification obligations in most states, so flag that early if your project sits near a border.
Store every docket digitally as it’s issued, not in a folder on-site that can go missing during a busy week. A cloud folder organised by waste stream and month makes audit prep a five-minute job instead of a two-day scramble. For general guidance on lawful disposal pathways and the evidence they require, Melbournecityrubbish’s guide to disposing of building waste walks through what documentation to expect from a compliant provider, and concrete-specific loads carry their own set of disposal considerations worth checking before you book a facility.
How do you write waste obligations into contracts and tenders?
The strongest WMP in the world doesn’t help if your subcontractors aren’t contractually bound to follow it. Waste obligations need to sit in the tender documents from the start, not get bolted on as a site instruction after trades are already mobilised.
Build these into your tender checklist:
- Waste classification responsibility — specify who classifies waste generated by that trade and against what standard.
- Receival site nomination — require the subcontractor to name the facility they’ll use, so you can check its licence before work starts.
- Transport monitoring compliance — mandate GPS or manifest tracking for any subcontractor moving bulk waste off site.
- Reporting obligations — set a docket submission deadline (weekly is common) tied to invoicing.
Payment is your most effective lever here. Linking payment milestones to evidence of lawful reuse or recycling, meaning dockets and EPL checks arrive before the invoice gets paid, is one of the more reliable contractual controls against unlawful disposal, according to the NSW EPA’s toolkit. Some builders go further and pay the receival facility directly rather than reimbursing the subcontractor, removing any incentive to dump illegally and pocket the difference. Others separate the payment for transport from the payment for disposal, so a transporter is compensated for the job regardless of where the load lands, cutting the temptation to cut corners on distance.
Due diligence on subcontractors should go beyond ABN and insurance checks:
- Confirm ACN and trading history for any waste transport subcontractor.
- Ask for environmental compliance history, particularly any prior EPA notices.
- Request references and sample dockets from recent jobs.
- Check the transporter’s licence covers the specific waste classes on your project.
When site conditions change (say, unexpected asbestos turns up mid-strip), update the WMP formally and record the variation with a date and reason, rather than letting the plan quietly drift out of sync with what’s actually happening on site. Budgeting realistically for clean-up and removal costs helps here too; the construction cleaning cost guide from ACT Cleaning by Demand gives a useful benchmark for what tidy-up and removal work typically costs across a project.
How do you monitor and report waste performance monthly?
A WMP that only gets looked at once, at approval stage, isn’t managing anything. Monthly reporting is what turns the document into an actual control, and it’s what auditors and clients will ask to see if questions come up later.
Your minimum monthly report should cover:
- Tonnes or cubic metres moved per waste stream that month.
- Destination facility for each stream.
- Diversion rate achieved against your target.
- Any non-conformances (wrong bin, contaminated load, missed docket).
- Unexpected finds and how they were handled.
Reconciliation is the step most projects skip, and it’s the one that catches problems early. Compare your forecast quantities from the WMP against actual weighbridge and receival dockets each month. If your plasterboard forecast was 340 kilograms and the dockets show 600, that gap is worth investigating before it becomes a pattern across every material stream.
Diversion targets worth benchmarking against: council SWMMP templates commonly set an 80% minimum diversion threshold for construction and demolition projects. Construction and demolition waste remains the largest single waste stream nationally, which is exactly why integrating your WMP into the broader construction environmental management plan (CEMP) with regular audits matters so much.
Record retention should match whatever your council or client contract specifies, but a practical default is keeping every docket, manifest, and monthly report for the life of the project plus several years afterward. When an audit does land, that history should let you trace any cubic metre of waste back to a specific date, load, and destination facility without digging through emails.
What actually goes wrong on real projects?
Plenty of WMPs read well on paper and fall apart in the field. A few patterns show up again and again across demolition and construction jobs, and they’re worth knowing before you finalise your own plan.
- Diversion targets get set too optimistically. Demolition works with a genuinely enforced WMP can realistically hit 70–90% recycling rates, but that range depends entirely on enforcement, not aspiration. A plan that assumes 90% without daily supervisor checks and contractual teeth usually lands closer to 50%.
- Unexpected finds derail schedules when there’s no procedure. A written finds procedure, covering immediate isolation, a contact list for NATA-accredited sampling, and a pre-approved contingency budget, prevents a discovery of suspected asbestos or contaminated soil from turning into a week-long stoppage while everyone scrambles to work out who to call.
- Bin counts get mistaken for proof. Counting skips filled is not evidence of lawful disposal. Weighbridge dockets and receival receipts are what auditors actually want, and a project relying on visual bin counts alone will struggle to reconcile anything if questions arise later.
- The contingency budget gets treated as optional. Every experienced site manager has seen a job where contaminated soil surfaced without warning, and the projects that handled it smoothly were the ones with a contingency line already allocated, not the ones scrambling to find funds mid-stoppage.
- Segregation zones get decided on the fly. Allocating dedicated stockpile and bin zones on the site plan before work starts, complete with stockpile height limits and bunding specs, avoids the improvised bin placement that leads to cross-contamination once the site gets busy.
None of these failures are exotic. They’re the predictable result of treating the WMP as a document to file rather than a working system the site actually runs on.
A copy-paste WMP template and worked example
Keep the working template to one page. Assessors and site supervisors both respond better to something they can scan in under a minute than a twenty-page document buried in boilerplate.
One-page WMP template fields:
- Project name, address, and responsible person (with direct contact).
- Waste stream table (see below) covering every material expected on site.
- Receival site register: facility name, licence status, accepted waste types.
- Transport and tracking method for each stream.
- Roles: who classifies, who books removal, who reconciles dockets monthly.
- Contingency procedure and allocated budget for unexpected finds.
- Attachments: bin layout diagram, any sampling or lab results, supporting dockets.
Here’s how that waste stream table looks filled in for one material, using the plasterboard example worked through earlier:
| Field | Entry |
|---|---|
| Waste stream | Plasterboard offcuts |
| Estimated quantity | ~340 kg (typical margin on 200 sheets) |
| Classification | General solid waste (non-hazardous) |
| Destination | Named recycling facility (EPL checked) |
| Transport method | Covered ute, tracked via manifest |
| Evidence required | Receival docket, monthly manifest entry |
| Responsible person | Site supervisor |
Repeat that row structure for every material stream on your project, timber, concrete, bricks, excavated soil, and green waste, and the table becomes your master quantity forecast as well as your reconciliation reference once actual dockets start coming in.
Attach your bin-layout diagram as a separate page, along with any pre-characterisation sampling results for soil or suspect materials, and keep a running folder of supporting dockets referenced by date. That’s the whole package most councils and CEMP appendices expect, and it’s genuinely faster to assemble than most builders think once the table above exists as a working document rather than a one-off exercise.
Turning your WMP into action on site
Writing the plan is the easy half. Melbournecityrubbish handles the operational side that actually keeps a WMP compliant once work starts, project-based collections for demolition debris, scheduled pickups for ongoing builds, and the paperwork trail (weighbridge dockets, receival evidence, monthly reporting support) that your monitoring section demands. Rather than juggling separate bookings for timber, concrete, and green waste across different providers, one service that documents every load against your WMP’s tracking requirements saves the reconciliation headache described above. Whether you need a single skip for a small renovation or ongoing collections across a multi-stage demolition, get a quick quote and have your evidence trail sorted before the first load leaves site.
Where to find the official templates and guidelines
The NSW EPA’s construction and demolition waste toolkit remains the most detailed primary reference for WMP content and waste classification requirements. For a ready-made template with conversion tables and estimating methods, WALGA’s construction waste management guidelines offer a solid starting structure many councils accept with minor adaptation. If your project involves larger-scale transport monitoring or GPS tracking obligations, the Transport for NSW waste management guideline sets out the operational detail. For budgeting removal and clean-up costs alongside your WMP, the construction debris removal cost guide gives a useful sense of what to allocate.
Sources
- Construction and demolition waste: A management toolkit (NSW EPA PDF)
- Waste management guideline (Transport for NSW, May 2023)
- Weighbridges and disposal levy guidance (Queensland Government)
- Construction waste management in Australia: guide for principal contractors (HSE Direct)
FAQ
What should a waste management plan include?
A compliant WMP needs a waste classification method, estimated quantities per stream, named receival sites with licence checks, a transport and tracking method, defined roles, a reporting schedule with diversion targets, and a contingency procedure for unexpected finds.
What should be included in a construction management plan?
Beyond the waste-specific elements, a broader construction management plan (CEMP) ties the WMP into site logistics, environmental controls, and regular audits, since construction and demolition waste is the largest waste stream nationally and needs plan-level oversight, not standalone treatment.
What are the 7 R’s of waste management?
Definitions vary across sources, but most versions build on the waste hierarchy’s core principle of avoidance-first thinking: rethink, refuse, reduce, reuse, repair, recycle, and recover, with avoidance always ranked above disposal.
What are some examples of construction waste?
Common streams include excavated soil and rock, bricks, concrete, timber, plasterboard, roof tiles, metals, green waste, and occasionally asbestos or contaminated soil, all of which must be classified against state EPA waste classification guidelines before leaving the site.